[ad_1]
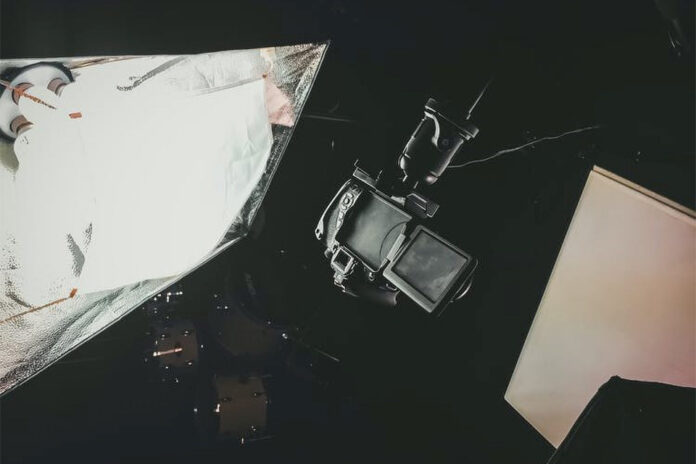
The lighting is one of the most important aspects of photography. The choice of lighting for your project depends on the subject, concept, and mood of the image you are trying to convey. If you’re an amateur or a professional photographer, brushing up on different lighting styles, especially when and how to use them, could be a big help.
The perfect light varies for every situation, but with this handy guide, you’ll begin to understand how to choose the right type of lighting for your photos in each scenario.
Using Different Lighting Types: When and How

Learning to control the light when taking pictures can enhance the angles and curves of your subject. Following are some of the best lighting styles for photography and how you can incorporate them into your next passion project.
1. Butterfly Lighting

A butterfly light simply involves placing the light source above and before your subject to create an impression of an under-the-nose shadow that seems to resemble a butterfly.
The primary reason butterfly lighting gets used on women, especially when photographing portraits, is because this type of light beautifully accentuates the prominent features of the high cheekbones. When you picture Meryl Streep in glamour and headshot shots, you can imagine how well butterfly lighting works for her.
The downside of butterfly lighting is the shadows it creates on your model’s face from deep-set eyes. Make sure you know how the light will affect the face and the features of your subject.
You will see professional photographers placing a reflector or an additional lower power light underneath the chin of the subject. By doing so, you soften the look and reduce the shadows caused by your light position.
2. Loop Lighting
Photographers and subjects alike prefer loop lighting. Why is that? For the simple reason that it enhances everyone’s beauty. Loop lighting creates a shadow just under and to the side of one nostril and the nose just when light is 45 degrees to the side and slightly above eye level.
Using loop lighting, you get snapshots that are less dramatic and intense, so curves, angles, and features don’t appear accentuated, and everything looks more natural.
For loop lighting, position artificial light a little higher than the subject/model’s eye level and 45 degrees away from them. When you move the light up and down, and the light closer or farther away from your subject, you can experiment with a more or less defined loop.
3. Rembrandt Lighting
Rembrandt used light to enhance his portrait paintings, hence the name of this style of lighting. As such, Rembrandt is a type of side lighting.
The difference between the two is that Rembrandt’s lighting produces a triangle of light under the eye on a model’s side of the face that is in shadow. A two-dimensional image can take the form of a three-dimensional snap in this manner.
4. Split Lighting

Split lighting is a type of side lighting. You can achieve this in your photography by placing the source of light to one side so that the light hits your subject at an angle of 90 degrees.
You can distinguish split lighting from standard illumination in magazines, billboards, and portraits by the way the subject’s one half get brightened by the light coming from one side and the other half is in shadow. You’ll see the shadow line that runs straight down the middle of the forehead, nose, and chin.
When you use split lighting on your subject, you are going to end up with an image that looks tough and masculine, so choose your subject carefully. A dramatic portrait using this technique is a great choice, especially if you are using a hard light instead of a soft light.
The Best Lighting Tips For Photographers

Practising and learning the different types of lighting and how to use them efficiently are very important to becoming a pro at photography. Check out some things you need to know about photography lighting before clicking your next shot.
• Softer Light Comes From Larger And Closer Light Sources

The light from a large source fills in shadows and illuminates the scene more evenly when it hits your subject from several directions. When light is brought closer, the intensity increases on your subject. The intensity decreases as the light is brought farther away.
Make sure you pose your subject near a large, bright window that is not directly in the sun. In order to create more flattering light for indoor photographs, move lamps closer to the subject or vice versa.
• Scattering Of Light Due To Diffusion
When the sky is cloudy, a diffusion effect occurs. This is great if the bright sun becomes a bother. You can soften the light falling on your subject or model using a light tent or a white screen when there are no clouds.
• Creating Volume With Shadows
Hollywood lighting bears a striking similarity. Light a spot high above your subject, angled down, but not so much that the shadow falls past the upper lip. This will create volume in the photo accentuated by shadows.

You now know the different types of lighting, so choosing the right lighting for your photos will be less of a challenge. You can’t help but take great photographs when you keep them in mind and apply the photography lighting tips we discussed above.
The post Photographing With Different Lighting Styles: When And How To Use Them appeared first on The Lightbulb Co. UK.
[ad_2]
www.thelightbulb.co.uk


