[ad_1]

Take an inventory of your home’s electrical system, and you’ll find cables, outlets, switches, circuit breakers, and boxes. An electrical box provides a code-approved place to house cable connections, whether for outlets, switches, or splices. Read on to learn more about junction boxes and how to install one.
What is a Junction Box?
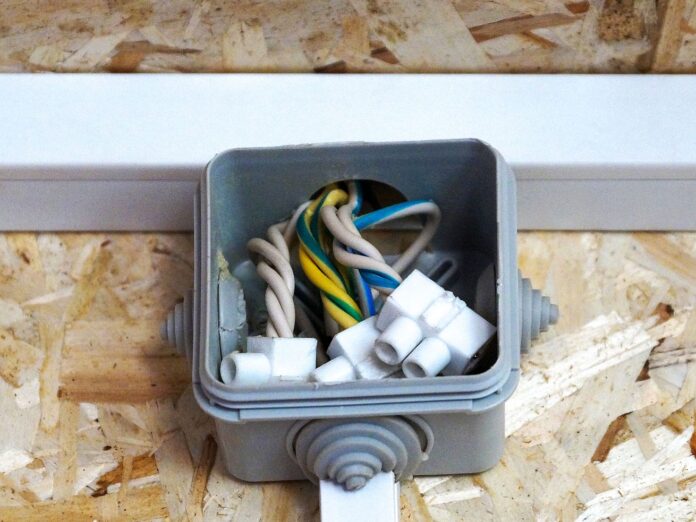
A junction box is an electrical box used to house splices. A junction box protects the connections inside it, prevents potential electrical shocks, and keeps sparks from spreading to flammable surroundings. There are two types of junction boxes: new work, installed where the wall framing is open, and old work, installed after the drywall is in place.
Each type is available in metal or plastic. Metal boxes are used primarily to house metal conduit or armored (BX) cable. Plastic boxes are used to house the more common non-metallic (plastic) sheathed cable. Junction boxes are attached to the wall framing at the surface of the drywall with their solid (hole-free) covers exposed. A junction box can also be mounted on an exterior wall, with a waterproof cover to keep the connections dry. Wherever a junction box is located, its cover must remain accessible.
Junction Box Size
Junction boxes are sized according to how many conductors they can hold—because, among other things, an overstuffed junction box is a fire hazard.
The National Electrical Code has published a chart that determines a junction box’s correct size, based on the number and size of the conductors it must accommodate. The size of a conductor is expressed as AWG (American Wire Gauge); the smaller the number, the larger the wire. Common household wiring is usually 16, 14, or 12 AWG. As an example, the code allows 2 cubic inches of space for each 14-AWG conductor, so if you have two cables with three conductors each (a total of six), you’ll need a box that’s 4” x 2-⅛” x 1-⅞”, a minimum volume of 13 cubic inches.
Steps for Wiring and Installing a Junction Box
First, turn off the power for the circuit you’ll be using. (If there’s a light on that circuit, turn it on before you flip the circuit breaker, and if it turns off, you can be reasonably sure that the circuit is disconnected. But don’t do anything yet!)
- Use the voltmeter or non-contact circuit tester to check whether the conductors are actually disconnected. When you’re sure that there’s no current, proceed to the next step.
- If you’re installing an interior box, use screws or nails to attach the box to a stud, positioned so that the face of the box is flush with the drywall. Exterior boxes should be attached with screws; the back of the box should have small holes for that purpose. If you have a metal box, use a screwdriver as a lever to remove the knockouts (the precut metal discs on either side of the box). You’ll also need to install cable clamps in the metal box. These thread into the box from the outside. Plastic boxes have integral clamps.
- Bring the cables into the box through the clamps. Make a mark on the cable about ½ inch beyond the clamp, withdraw the cable, measure and cut the conductors about 6 inches beyond the mark, then strip the cable’s plastic or metal sheathing back to the mark. Bring the cable back into the box. If it’s a metal box, tighten the cable clamps onto the sheathing; plastic box clamps are self-tightening.
- Wire strippers have gauged cutters for various sizes of wire. Choose the proper gauge for the wire you’re using, then test the gauge by placing the end of one conductor into the stripper, squeezing down to score, and pull off the insulation. Examine the conductor. If you’ve cut or damaged some of the wire, use the next larger gauge. Now use the wire strippers to remove ¾ inch of the insulation from the end of each conductor.
- When all the conductors have been stripped, join the bare copper or green insulated ground wires first. Use pliers or the gripping end of the wire strippers to twist the ground wires together, then twist a wire nut onto the wires to keep them together. Note: If you’re working with a metal box, you’ll need to add a pigtail (a separate 4- to 6-inch length of ground wire) to the other grounds and connect it to the green ground screw located inside the box. Wrap the pigtail clockwise around the screw and tighten the screw. Note: Be sure to use the correct size wire nut: if the nut is too small, the wires won’t fit, and if it’s too big, the wires could loosen and fall out. Wire nuts are color-coded for AWG and capacity, both of which are also listed on their packaging. For instance, an orange wire nut is rated for use with a minimum of two 18-AWG wires to a maximum of three 16-AWG wires.
- Now connect the neutral (white) wires, then the hot (black) wires, following the procedures outlined in Step 6. Give the wire nuts a tug to make sure they’re on tight and there are no loose wires. Carefully and neatly fold the joined wires back into the box. Place the cover onto the box front and tighten the screws. Now you can turn the power back on and check to see that your connections are working.
What You Need
Materials
- Code-approved electrical box
- Cable clamps (for a metal box)
Tools
[ad_2]
www.thisoldhouse.com


