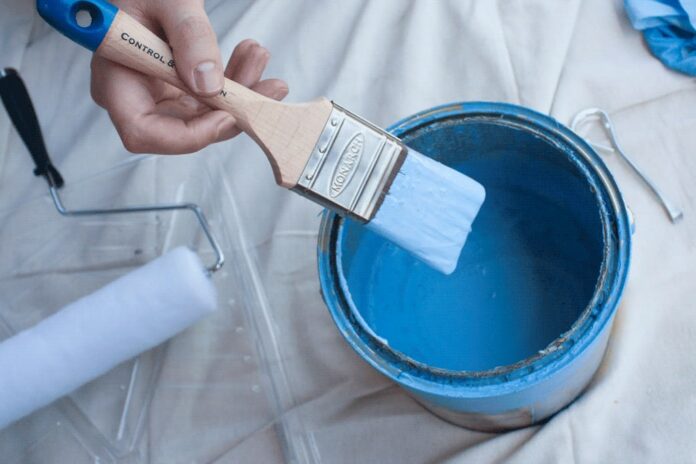
There’s something about a fresh coat of paint that can instantly breathe new life into a space – here’s how to get your next paint job looking like a professional’s.
Painting projects are exciting yet daunting at the same time, because when we think about the prep work, the labour required, and the skill involved – it can all feel a bit overwhelming.
But no need to stress, because with practical steps and expert insight, the process can become a pretty simple one which pretty much guarantees a successful painting project.

Here are some expert tips for nailing your next DIY paint project.
1. Prep work is key
The key to a successful painting project lies in the prep work.
Ensure the surface is clean, dry, and free of any debris. Sand down any rough spots, fill any holes or cracks, and prime the surface before painting.
Skipping these crucial steps may lead to a not-so-satisfactory finish and could end up costing you more time and money in the long run.
2. Invest in quality tools
Investing in high-quality tools will make the job much easier and yield better results.
Quality brushes, rollers, and paint trays are all essential tools that should be of good quality.
“Cheap brushes tend to shed bristles and leave behind streaks, while low-quality rollers can leave an uneven finish, which will take longer to perfect in the long run,” Monarch painting expert Mark O’Connor says.
“Good quality tools also pick up and release paint easily and deliver a smoother professional finish.”
“They also save you time because, being easier to use, the brushes cut straight edges faster than a budget brush, and the roller puts on paint smoother,” he adds.
Additionally, a good-quality paint tray with a liner will make the job much cleaner and more efficient.

It’s worth taking the time to do some research on what you need before embarking on your painting journey with the Monarch product finder that can guide you through the process.
3. Choose the right paint
The type of paint you choose will depend on the surface you are painting.
“For ceilings, you should paint in a ‘flat finish’ to hide any imperfections like plaster joins or repaired filler marks,” Mr O’Connor says.
“Walls should be painted in a flat or low sheen water-based wall paint, and woodwork needs a tougher paint as they are subject to harder wear and tear.”
Mr O’Connor also says that while some paints might have worked in the past, times have changed, and so has paint.
“In the past, you had to apply oil-based enamel paint to woodwork to ensure you got that strong, tough finish.”
“These days there are outstanding water-based enamel paints that can be used on woodwork.”
“They provide the convenience of quick drying, quicker recoat times, less smell lingering after painting, and the white water-based enamels don’t ‘yellow’ over time as oil base enamels do.”
Choosing the right paint will ensure a long-lasting finish and save you from having to repaint sooner than expected.
4. Choose the right amount of paint
Before you head to the paint shop, do the math.
Work out the square meterage of the area to paint. Double it to allow for two coats of paint to be applied.
Divide that by 14 or 16 to work out how many litres of paint you need (as one litre of paint covers 14 to 16 square meters).

For example, a standard room that’s 3 x 3 meters with four walls will need around 4 litres of paint.
A litre of paint can apply two coats of paint to both sides of around two doors.
5. Know how to work your tools
This step is probably the most crucial.
To get the best result from your painting tools, follow these steps.
Brushes should be moistened before use. Let them stand in an inch of water for 10 minutes. Shake off the excess water, and then get going.
Run rollers under a tap for about 2 minutes and remove any loose fluff, then squeeze out as much water as possible. Put it in your roller frame, and spin it down a clean wall until no water spins out of the roller.
When loading a brush, it only needs about an inch of paint up the filament – don’t load it all the way up, or the paint will dry out at the top half of the brush.
Run your roller up and down the grill of the tray several times until it looks like it has a uniform amount of paint around the entire roller.
6. Protect your floors and furniture
Painting can be messy, so it’s important to protect your floors and furniture.
Cover your floors with a drop sheet or plastic sheeting and move any furniture out of the room or cover it with plastic.
This will ensure that your floors and furniture don’t get damaged by paint drips or spills.
7. Don’t rush the process
One of the biggest mistakes people make when painting is rushing the process, according to Mr O’Connor, so take your time and be patient.

“Rushing can lead to sloppy work, which could ultimately cost you more time and money,” he advises.
“The key to a successful painting project is in the prep work and taking your time during the actual painting process.”
8. Clean your tools properly
Cleaning your tools properly is essential for their longevity.
Rinse brushes and rollers in warm, soapy water until all the paint is removed. Let them dry completely before storing them away.
9. Finally, enjoy the process
Painting can be therapeutic and satisfying.
Put on some music, invite a friend to help, and enjoy the transformation of your space.
Take pride in your work, and don’t be afraid to show it off.
The post 9 expert tips to nailing your next DIY paint project appeared first on realestate.com.au.
www.realestate.com.au


