
[ad_1]
Are you tired of that old, leaky kitchen faucet? Replacing a faucet kitchen not only adds a fresh touch to your kitchen, but also saves water and reduces the risk of water damage. In this blog post, we’ll guide you through the entire process of replacing your kitchen faucet, step by step, making it an easy and rewarding project. Let’s dive in!
Key Takeaways
- Replace your kitchen faucet with ease – gather the right tools, understand sink specs and pick a fitting faucet!
- Remove old fixture safely and clean sink holes for easy installation of new one.
- Test for leaks & functionality to ensure successful transformation of your kitchen!
Preparing for Faucet Replacement

Before you begin replacing your kitchen faucet, make sure you have all the necessary equipment for the procedure. Gathering the necessary tools, understanding your sink’s specifications, and choosing the perfect faucet for your kitchen will make the process smooth and stress-free.
How to Fix a Leaky Faucet
If you’re dealing with a persistent leaky faucet, don’t worry; it’s a common household issue that can be easily resolved and we will tell you How to Fix a Leaky Faucet? To begin, gather the necessary tools: an adjustable wrench, a screwdriver, and replacement parts like washers or O-rings. Next, turn off the water supply to the faucet either at the shutoff valve located under the sink or at the main water valve. Once the water is off, carefully disassemble the faucet, paying close attention to the order of the parts. Inspect the washers and O-rings for signs of wear or damage, as these are often the culprits behind leaks. After replacing any worn-out components, reassemble the faucet in the reverse order and turn the water supply back on. Test the faucet to ensure the leak has been successfully fixed.
Necessary Tools
To replace a kitchen faucet with ease, you need key tools such as:
- A basin wrench: specifically designed to remove and install faucet nuts in tight spaces, making it invaluable for this project
- Adjustable wrench: can be used to access and secure the faucet nut for three-hole faucets
- Slip-joint pliers: can also be used to access and secure the faucet nut for three-hole faucets
These tools will help you disconnect water lines and remove the old faucet with ease.
Remember, it’s always a good idea to take a photo of your current faucet setup before dismantling it. This way, you’ll have a visual reference to help you reassemble the new faucet, including the supply lines.
Sink Specifications
Grasping your sink’s specifications plays a crucial role in achieving a perfect fit for your new faucet. Start by determining the number of sink holes and whether you need a deck plate for installation.
For instance, a three-hole faucet provides separate hot and cold handles for temperature control, while a single-hole faucet combines these functions into one handle. Keep in mind that you can install a one-hole faucet in a three- or four-hole sink with the help of a deck plate.
Choosing the Right Faucet
Given the vast variety of kitchen faucets, choosing one that aligns with your needs, style, and budget is paramount. Consider the following factors when choosing your new kitchen faucet:
- Height: Determine the height that will work best for your sink and kitchen setup.
- Finishing: Choose a finish that matches your kitchen decor and is easy to clean.
- Number of sink holes: Check how many holes are available in your sink and choose a faucet that matches.
- Material: For durability and reliability, opt for a faucet made of brass, either solid or cast.
When it comes to design, let your existing room and home inspire you, but remember that a faucet can also be a statement piece. Opting for a unique and sculptural design can create an eye-catching impact that elevates your kitchen’s aesthetic.
Removing the Old Kitchen Faucet
Now that you’re well-prepared, you can begin the process of removing the old faucet. Follow these steps to ensure a safe and successful removal, making way for your stunning new kitchen faucet.
How to Fix a Kitchen Faucet Leak
If you’re dealing with a persistent kitchen faucet leak, don’t worry; it’s a common issue that can often be resolved without the need for a professional plumber. Learning how to fix a kitchen faucet leak can save you money on water bills and prevent further damage to your sink area. In this guide, we’ll walk you through the steps to diagnose and repair a leaky kitchen faucet, whether it’s a simple drip or a more complex issue. With some basic tools and a little know-how, you can tackle this common household problem with confidence.
Shutting Off Water Supply
Before proceeding, make sure to cut off the water supply to the faucet. Locate the stop valves (usually found under the sink) and turn them clockwise to shut off the flow of water. If your water supply lines don’t have stop valves, you’ll need to turn off the main water supply to your entire house.
Next, follow these steps to disconnect the old faucet from the water supply.
- Open the faucet (both hot and cold sides) to empty any water remaining in the pipes.
- Use an adjustable wrench to loosen the connections.
- Keep the supply line from twisting by using a second wrench or your hand to hold it in place.
- Be prepared for any water that may leak out during the disconnection process by having a bucket handy.
Loosening and Removing Mounting Nut
Once the water supply is disconnected, proceed to remove the mounting nut that holds the old faucet. A basin wrench is the ideal tool for this job, as it allows you to easily access and loosen the faucet nut in tight spaces. An adjustable wrench can also be used to remove the mounting nut if a basin wrench is not available.
Once you’ve removed the mounting nut, double-check to ensure there are no remaining parts attached to the old faucet. With everything disconnected, you can now safely remove the old faucet from the sink.
Cleaning Sink Holes
Clean the sink holes thoroughly before you install the new faucet to facilitate a seamless installation process. Use a sink-cleaning brush or pipe cleaner to remove any build-up or debris from the holes. For stubborn stains, create a paste of water and baking soda and scrub the sink holes with a toothbrush to restore their original shine.
After cleaning, rinse the sink holes with cold water to remove any residual cleaner. Your kitchen sink is now ready for the installation of your beautiful new kitchen faucet.
Installing the New Faucet

With the old faucet removed and the sink holes cleaned, you can now proceed to install a kitchen faucet. Let’s get it installed! Follow these steps to ensure proper connections and alignment for a perfect fit and flawless function.
- Turn off the water supply to the sink.
- Place the faucet
Positioning the Faucet
Begin by positioning the new faucet on the sink, ensuring it’s correctly aligned with the sink holes. Pass the faucet’s tubes through the holes, and slide the mounting nut and washer onto the tubes from beneath the sink. Tighten the nut to secure the faucet in place, being careful not to overtighten and damage the countertop.
Connecting Water Supply Lines
After securely attaching the faucet to the sink, proceed to connect the faucet supply lines to the respective hot and cold water lines. Wrap the threads of the water supply connections with Teflon tape to create a watertight seal and prevent leaks.
Using an adjustable wrench, tighten the connections, ensuring they are secure but not overtightened.
Installing Optional Components
If your new faucet includes optional components like a soap dispenser or sprayer, now is the time to install them along with the faucet body. Follow the manufacturer’s instructions for installation, ensuring each component is securely fastened and positioned correctly.
These additions can enhance your kitchen’s functionality and provide added convenience, while also allowing for personalized content and ads to improve your overall experience by the way they use cookies and data.
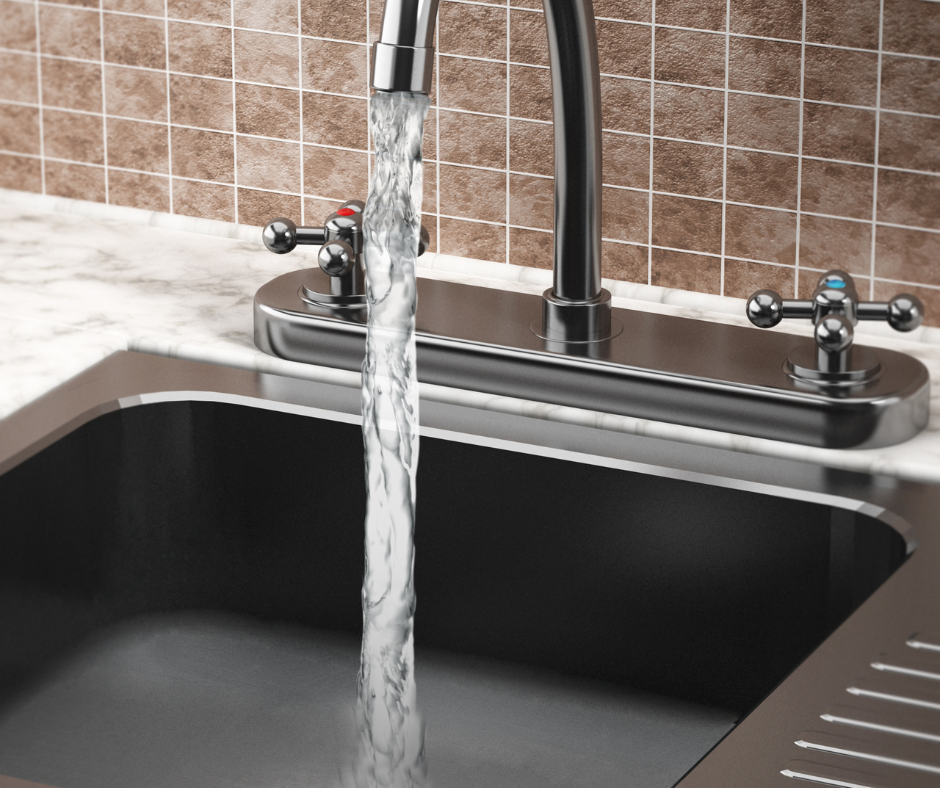
Testing for Leaks and Proper Functionality

Once you have installed the new faucet, it’s essential to remove the existing faucet and conduct a test for leaks, verifying that everything works as expected. This crucial step will give you peace of mind and confidence in the quality of your installation.
Leak Detection
Begin by visually inspecting all the connections, including supply line connections, checking for any signs of leaking.
Turn on the water supply slowly and watch for any water seeping out of the connections.
If you notice any leaks, turn off the water supply, add more Teflon tape to the threads, and tighten the connections again.
Faucet Leaking Outside
If you’ve noticed a faucet leaking outside your home, it’s essential to address this issue promptly to prevent water wastage and potential damage. A leaking outdoor faucet not only leads to increased water bills but can also result in erosion of the surrounding landscape and even damage to your property’s foundation. Identifying and fixing the source of the leak is crucial for both environmental and financial reasons. In this guide, we’ll explore the common causes of outdoor faucet leaks and provide practical solutions to help you resolve this problem and maintain your water efficiency.
Faucet Functionality
After confirming there are no leaks, test the faucet’s functionality by:
- Turning it on and checking the water flow
- Checking the temperature control to make sure it adjusts properly
- Making sure the faucet turns on and off smoothly
If your sink faucet has a sprayer, test it as well to ensure it’s functioning correctly.
Maintenance and Troubleshooting

For your new kitchen faucet to maintain its look and perform optimally, regular maintenance and troubleshooting are necessary. By taking care of your faucet and addressing common issues, you’ll prolong its life and enjoy its benefits for years to come.
Regular Maintenance

Keeping your faucet clean and functioning optimally requires regular maintenance. Here are some tips to follow:
- Wipe down the faucet daily with a damp cloth and mild soap to maintain its shine.
- Avoid using abrasive cleaners, as they can damage the faucet’s finish.
- Use a microfiber cloth to polish the faucet for a dazzling finish.
By following these maintenance tips, you can keep your faucet looking and working great.
By regularly cleaning and inspecting your faucet for signs of wear, you’ll ensure it stays in top condition.
Troubleshooting Common Issues
When issues arise, don’t panic. Diagnosing and fixing common problems like leaks or reduced water flow is often straightforward. Identify the issue, investigate the potential causes, and find a solution.
Check the installation, inspect the parts, and clean the aerator to ensure a successful repair.
Summary
In conclusion, replacing your kitchen faucet is a rewarding project that adds value, style, and functionality to your home. By following this step-by-step guide, gathering the necessary tools, and understanding your sink specifications, you’ll be well on your way to enjoying your beautiful new kitchen faucet for years to come.
Frequently Asked Questions
Is replacing a faucet hard?
Replacing a faucet is not difficult, requiring only a few common tools and an hour of time.
Following the directions included with your new faucet should have you washing up in no time.
How do you remove an old kitchen faucet?
Remove an old kitchen faucet by using an adjustable wrench to disconnect the hot and cold water supply lines.
You may need to spray penetrating oil on the mounting nuts that secure the faucet to the sink. After that, the faucet should lift right out; you might also need to squeeze the faucet’s tubing together under the sink.
How do I determine the number of sink holes and whether a deck plate is needed?
Count the number of sink holes to determine if you need a deck plate for installation of a one-hole faucet in a three- or four-hole sink.
How do I ensure my faucet is correctly positioned and secured to the sink?
Secure your faucet to the sink by positioning it on top, passing the tubes through the holes, and tightening the nut and washer from underneath.
How can I check for leaks after installing the new faucet?
Visually inspect all connections, turn on the water supply slowly, and watch for any water seeping out to check for leaks after installing the new faucet.
The post How to Replacing a Faucet Kitchen in 5 Easy Steps appeared first on Kitchen Infinity.
[ad_2]
kitcheninfinity.com


