
[ad_1]
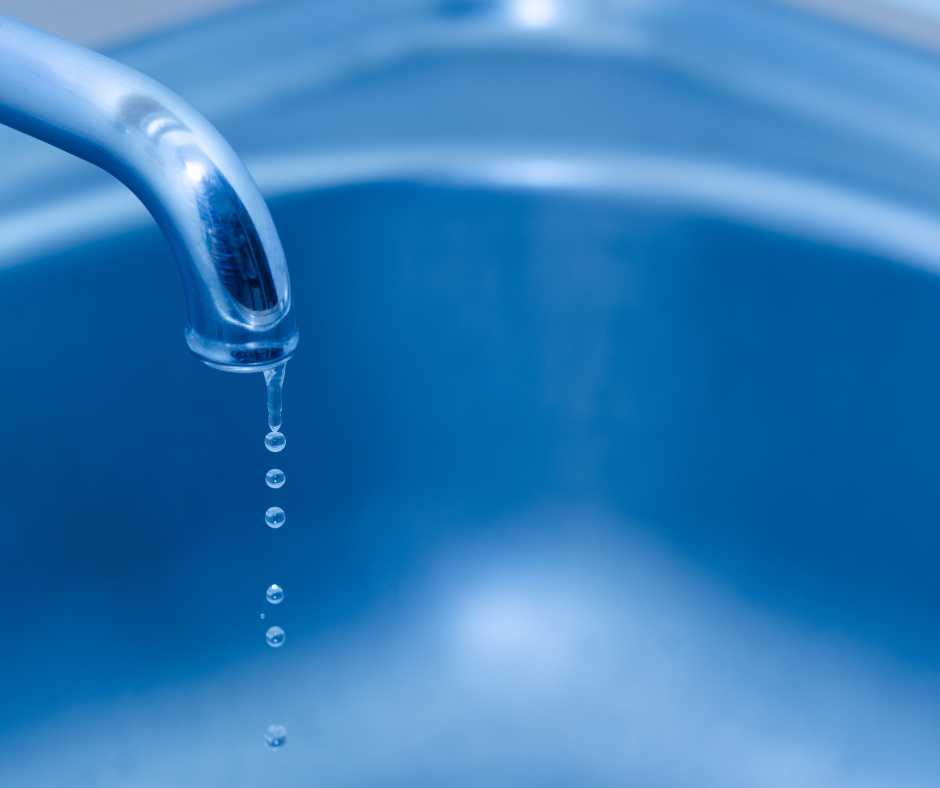
A bath faucet leaking is not only a nuisance, but can also lead to increased water bills and potential water damage. But fear not, intrepid homeowner, for a DIY repair is within your grasp! With a little know-how, the right tools, and some patience, you can fix that pesky bath faucet leaking and save yourself money in the process. Let’s dive into the world of faucet repair and uncover the secrets to stopping that drip.
Key Takeaways
- Understand the causes of a leaky bath faucet and identify individual components for repair.
- Gather tools, replacement parts, shut off water supply and prepare to disassemble the faucet.
- Replace worn or damaged rubber washers/O-rings, inspect & replace faulty stem/cartridge. Check for leaks before calling in professional plumber if necessary.
Understanding the Causes of a Leaky Bath Faucet
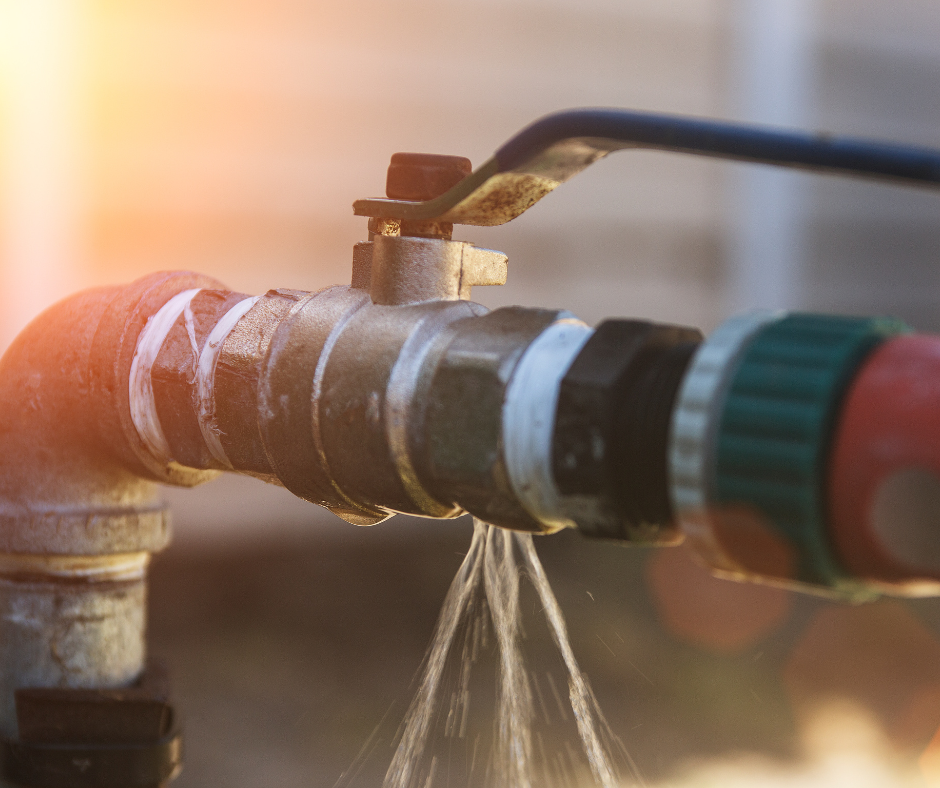
A leaking bathtub faucet can stem from various causes, including worn washers, faulty stems or cartridges, and rusty handles. A successful repair hinges on identifying the origin of the leak. If the water is hot or warm, the leak is likely from the left side (hot faucet), while cold water suggests an issue with the right side (cold faucet). In the case of two-handled faucets, it’s advisable to replace the washers and seats in both the hot and cold valves to ensure a thorough fix.
Although it may be tempting to replace the entire faucet assembly, most leaks can be resolved by replacing individual components. This approach is not only more cost-effective but also simpler than a full faucet replacement. Let’s collect our tools and replacement parts to address this leak directly.
How to Fix a Leaky Faucet
If you’re dealing with the frustration of a dripping tap, learning how to fix a leaky faucet can save you both water and money. A leaky faucet not only wastes precious resources but can also lead to higher water bills if left unattended. Fortunately, repairing it is a manageable DIY task that doesn’t require advanced plumbing skills. In this guide, we’ll walk you through the steps to tackle the common issue of a leaky faucet, empowering you to resolve the problem efficiently and effectively. So, let’s get started on your journey to a drip-free faucet!
Preparing for the Repair: Gather Tools and Replacement Parts
Before starting your faucet repair, make sure you have the necessary replacement parts like the faucet screw. It’s possible to find replacement parts at your local hardware store or home center. Bring the old components, like the faucet stem, with you will make it easier to find compatible replacements.
With our replacement parts ready, we can start preparing the faucet for repair.
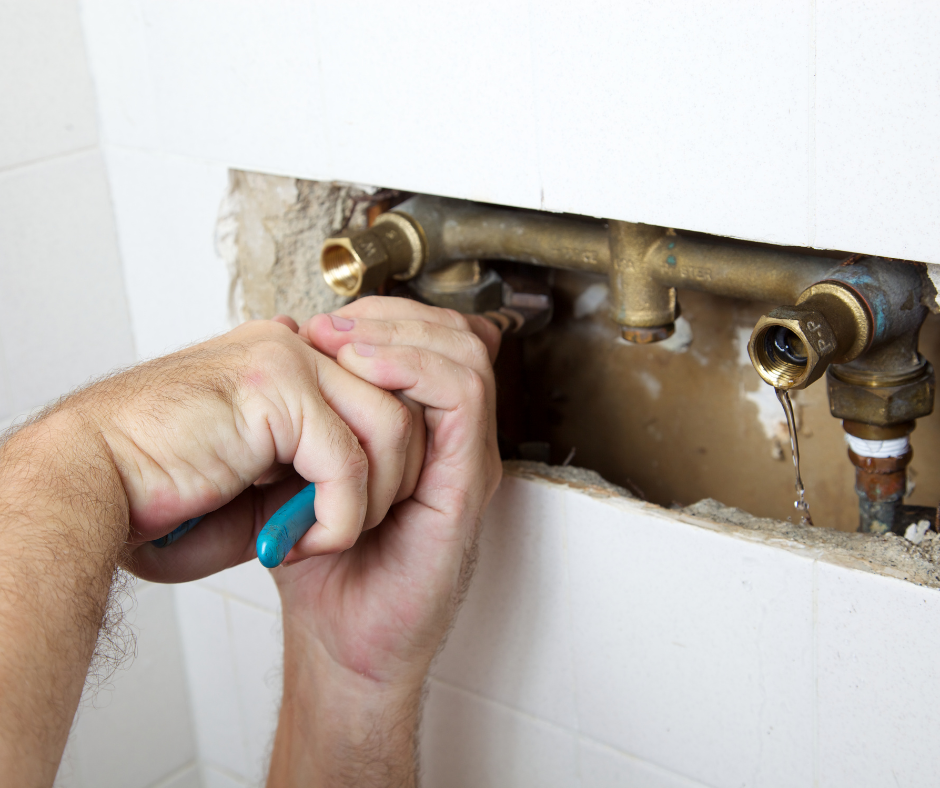
Shutting Off the Water Supply
Safety first, dear reader! Before attempting any repair, shut off the water supply to the faucet by turning the main water supply valve clockwise or the knife-style handle rightward.
Once the water supply is off, open the valves to drain any residual water from the system, including the shower head. This step will prevent any unwanted surprises as we delve into the inner workings of our leaky faucet.
Identifying the Type of Faucet
As the first step in the repair process, you need to determine the type of faucet you’re dealing with. Inspect the faucet for a logo or model number, which is usually engraved, printed, or laser-etched onto the surface. Additionally, the number of handles and water outlets can provide clues about the faucet type.
Types of faucets include ball, disc, single handle cartridge, and stem faucets. With the faucet type identified, we can move forward with confidence in our repair endeavor.
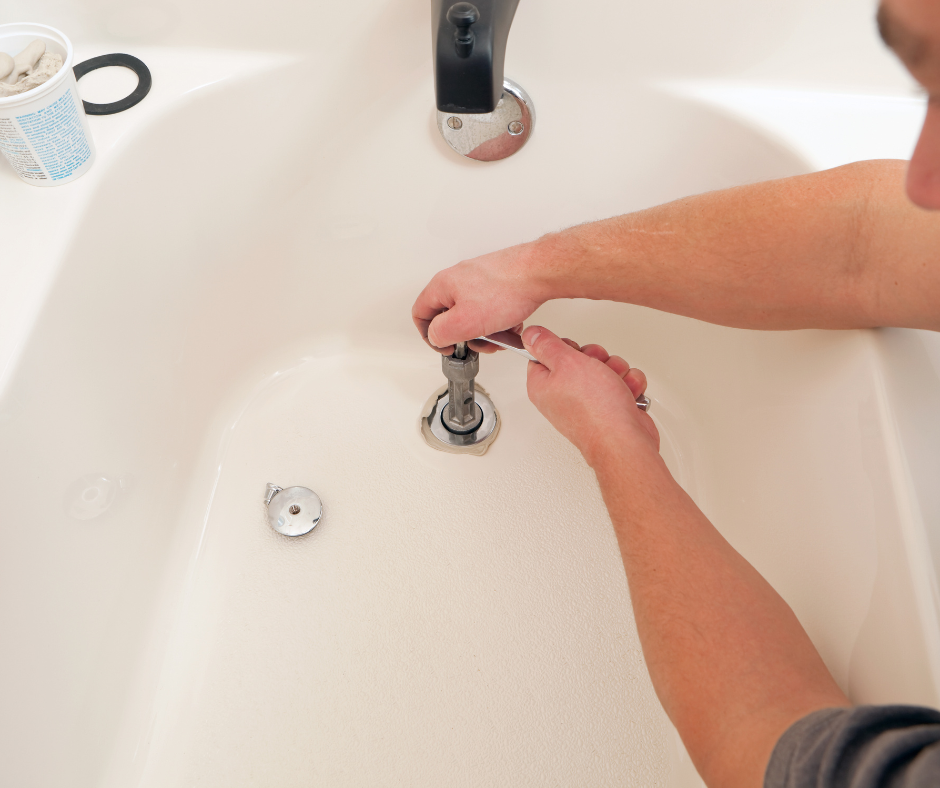
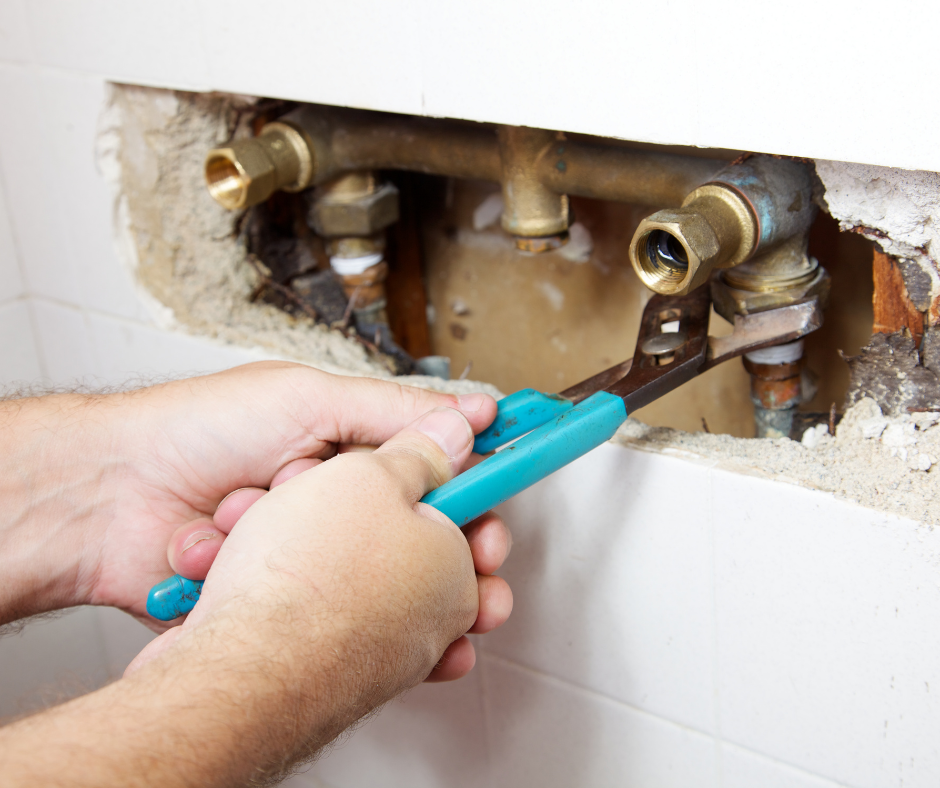
Disassembling the Leaky Faucet
Equipped with the necessary tools, including an adjustable wrench, and knowledge, we can proceed to disassemble the faucet for inspection and repair. Start by turning on the faucet to drain any remaining water from the system.
Next, we’ll need to remove the handle and escutcheon plate to access the inner components of the faucet. Remember to be gentle during this process, as excessive force can cause damage.
Removing the Handle
To remove the faucet handle, follow these steps:
- Unscrew the handle screw.
- Grip the handle firmly.
- Wiggle it gently and tug it off.
- If it doesn’t come off easily, use a hair dryer to heat the handle, which will help loosen it.
- Be cautious when pulling the handle off, as excessive force may result in breakage.
If you observe a small screw beneath the handle, use a screwdriver to remove it and loosen the handle. For handles with caps attached to the wall, simply twist the cap off. If the handle is difficult to remove due to corrosion on the stem, apply heat to the area to loosen the bond.
Long Neck Kitchen Faucet with Sprayer
A long neck kitchen faucet with sprayer is an essential fixture for any modern kitchen. This type of faucet is characterized by its extended neck, which allows for greater flexibility and ease when it comes to various kitchen tasks. The “long neck” design not only provides ample clearance for large pots and pans but also adds an elegant and contemporary touch to your kitchen decor. The integrated sprayer further enhances functionality, making it convenient to rinse dishes, wash produce, and clean the sink area efficiently. Whether you’re upgrading your kitchen or simply looking for a more versatile faucet, a long neck kitchen faucet with a sprayer is a fantastic choice that combines style and practicality seamlessly.
Detaching the Escutcheon Plate
Once the handle is removed, the next step is to remove the escutcheon plate. Unscrew the set screws using a Phillips head screwdriver. Once the set screws are removed, detach or unscrew the escutcheon plate.
With the escutcheon plate removed, we can now access the faucet’s internal components for inspection and repair.
Inspecting and Replacing Damaged Components
Once the faucet is disassembled, we can begin inspecting its components for wear or damage. Key parts to examine include the bonnet washer, O-ring, valve seat, and faucet connections.
If any of these components are damaged, they will need to be replaced to ensure a proper seal and prevent further leaks.
Replacing Rubber Washers and O-Rings
If the rubber washers or O-rings are worn or damaged, they’ll need to be replaced. Start by wiping down the back of the stem assembly with a rag. Remove the old washer or gasket and install a new one in its place using a seat wrench.
If a new screw is not included in the rubber washer replacement kit, clean the existing screw and re-insert it. With the new packing washer in place, we can move on to the next step, which involves the seat washer.
Replacing the Faucet Stem or Cartridge
Depending on the type of faucet, you may need to replace a faulty stem or cartridge. To do this, grip the cartridge firmly with pliers and pull it out in a straight line. If it’s difficult to remove, a cartridge puller tool can be utilized.
With the faulty stem or cartridge removed, install the new faucet stem and reassemble the faucet.
Reassembling the Faucet and Testing for Leaks
Having completed the repairs, we can now reassemble the faucet and test for any remaining leaks. This process involves:
- Putting the stem assembly back in place
- Attaching the escutcheon plate
- Reattaching the handle
- Turning the water supply back on
After restoring the water supply, it is vital to inspect for any leaks.
Faucet Leaking Shower
If you’ve noticed a faucet leaking shower, it’s essential to address the issue promptly to prevent water wastage and potential damage to your bathroom. A faucet leaking in the shower can lead to increased water bills and even mold growth if left unchecked. To tackle this problem, start by turning off the water supply to the shower. This will help minimize any further leakage. Next, carefully examine the faucet to identify the source of the leak, which could be a worn-out washer, a damaged cartridge, or a loose connection. Once you’ve identified the issue, you can either repair or replace the faulty components to put an end to your faucet leaking shower dilemma. Regular maintenance and prompt repairs will help ensure a leak-free and efficient showering experience.
Putting the Faucet Back Together
To reassemble the faucet, follow these steps:
- Fit the stem assembly back in place.
- Secure it with the brass nut.
- Replace the escutcheon.
- Slide the faucet handle back onto the stem.
- Screw the faucet into place.
- Snap the cap cover into place.
Be sure to tighten all connections securely to prevent future leaks.
Checking for Leaks
Now that the faucet is reassembled, we can proceed to test for leaks. Turn the main water valve back on slowly, allowing the water to flow through the leaking faucet. Inspect the faucet area for any signs of leakage, as well as the surrounding wall.
If a leak persists, further action may be needed, such as tightening connections or contacting a professional plumber.
When to Call a Professional Plumber
Even though DIY repairs can be cost-effective and satisfying, sometimes it is more prudent to call in a professional plumber. If your attempted repairs fail to resolve the leak or if access to the valve cartridge is restricted, it may be time to seek professional assistance.
A skilled plumber can diagnose and resolve stubborn leaks, ensuring that your leaky bathtub faucet functions as it should, while also offering a selection of bathtub faucets to suit your needs. If you need to fix a leaky bathtub, a professional plumber is your best option.
Summary
In conclusion, fixing a leaking bathtub faucet is a manageable DIY project for most homeowners. By understanding the causes of leaks, gathering the necessary tools and replacement parts, disassembling and repairing the faucet, and testing for leaks, you can save money and prevent water damage. With a little patience and determination, you can tackle that pesky leak and restore your bathtub faucet to its former glory.
Frequently Asked Questions
How do I stop my bathtub faucet from dripping?
Shut off the water supply, remove the faucet handle, replace the faucet washer, replace the faucet stem, check the faucet drain, and reassemble the faucet to stop a leaking bathtub faucet.
Why is the bottom of my bathtub faucet leaking?
It looks like the bottom of your bathtub faucet is leaking due to a worn-out washer or O-ring, corroded valve seat, or faulty cartridge.
To fix the leak, you’ll need to replace the washer or O-ring, clean the valve seat, or replace the cartridge. Depending on the type of faucet you have, the repair process may vary.
If you have a compression unit.
What is the most common cause of a leaky tub faucet?
The most common cause of a leaky tub faucet is a worn out washer, so replacing it with a new one can save you money on your water bill.
Why is my shower faucet dripping when I turn off the water?
The likely cause of your shower faucet dripping is due to a worn or cracked cartridge in the handle which is allowing water to seep through when it should be stopped.
Replacing the cartridge is a relatively simple job that can be done with a few basic tools. It is important to make sure you purchase the correct cartridge for your faucet, as there are many different types available.
How do I identify the type of faucet I have?
Inspect your faucet for a logo or model number, and take note of the number of handles and water outlets.
This will help you identify the type of faucet.
The post How to Fix Bath Faucet Leaking (DIY) – Step-by-Step Guide appeared first on Kitchen Infinity.
[ad_2]
kitcheninfinity.com


